Your browser is not supported. Please upgrade it to the latest version or download a freeware browser Chrome for correct working with website.


How to install deck railings?
Many homeowners choose to build a deck right along with the deck railing. They give the deck a complete look, and, among other things, ensure the safety of being outdoors. For decks with several floors, the installation of railings is mandatory. You don't have to call a contractor to build a railing - you can do it yourself. In this guide, we will give step by step instructions on how to do it.

Tools for deck railing installation
Before starting work, make sure that you have purchased all the necessary materials in the right quantity. First of all, you should have 4x4 posts and 2x2 balusters. Also make sure you have these tools:
- drill and drill bits;
- hammer;
- screws;
- nailer;
- tape measure;
- staple gun;
- miter, circular and track saws;
- level.
Decks railings installation stages
The whole process can be divided into 3 stages, each of which has its own steps. Following this instruction, you will be able to build a deck railing yourself without unexpected problems. Installation consists of the following steps:
Preparatory stage
- checking the drawing and the measurements specified there;
- leveling checking;
- mounting holes marking;
- tools quality and quantity checking.
Deck railing post installation
- making and drilling holes;
- mounting bracket insertion;
- post installation.
Railing installation
- measuring, cutting and mounting a handrail.
Preparatory stage
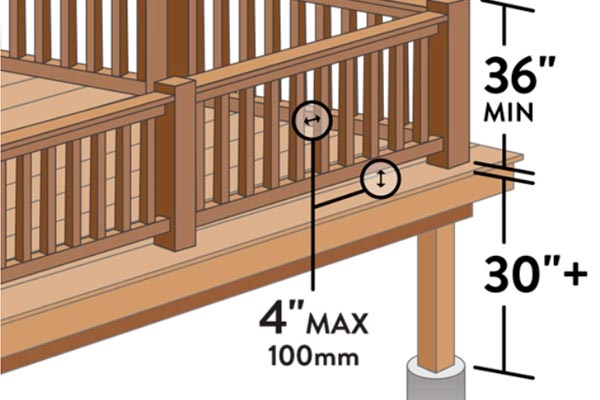
You must have a plan or drawing of a deck prepared, on which the railing is schematically marked. With this plan you will be able to calculate the length of the cables, the distance between 4x4 posts. Wood railings allow 8 feet between posts, while composite railings should be 6 feet apart. Cable average length may be 6 feet. Handrail height is determined by the Ontario Building Code and should be between 36 and 42 inches, depending on conditions.
Before you start work, you must know in advance where you plan to install the posts, what will be the distance between the rail underside and the deck, and what will be the height of the railing. Mark on the deck the places for drilling and the location of all elements. Double check that everything is ready for installation.
Deck railing post installation stage
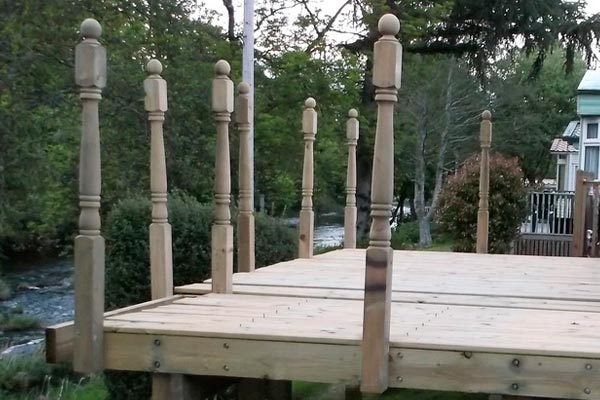
First of all, you need to cut out the posts. Remember that the height should be 8-10 inches above the railing. The extra height will give the railing a more aesthetic look. Also, when determining the height of the posts, consider that you need to leave a distance between the bottom rail and the deck.
Next, on each post, you need to cut an overhang with a saw. With this protrusion, you will then attach the post to the deck. Be sure to apply a finish to all posts before installing them.
Next, use a drill to set each post vertically. Then, at the top of each post, mark where the top railing will be installed. Add 1 inch to the calculations, taking into account the thickness of the balusters.
Deck railing installation stage
Next you will need to cut out the 2x2 balusters. Balusters are vertical posts between the lower and upper railings. In height, these balusters will be approximately equal to the height of the railing. The spacing between balusters can be 4 inches. You will also need 0.25" x 1.5" thin railing strips. Their length should be equal to the distance between the posts.
Before installation, all elements must be covered with a finish. Wait 24 hours for it to dry before installation.
Then the balusters should be attached to a thin strip so that the distance between them is not less than 4 inches. You can fix the balusters with a drill and 1.5-inch screws. Exactly the same strip must be fixed on the opposite side of the balusters.
Then, between the posts at the bottom, you need to attach the bottom railing. The newly created balustrade will then be attached to this lower railing. Remember that there must be a distance between the bottom rail and the board.
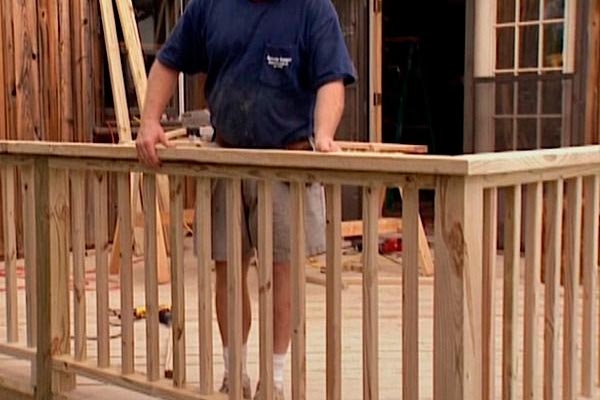
Similarly, the top railing should be attached to the top of the balustrade. It may be slightly wider for ease of use.
Order accessories for deck railing building at Decks Toronto
You can order all the necessary tools and accessories online in one place. Decks Toronto is Canada's largest decking supplier and also sells composite and glass railings and railing accessories. We will deliver the required materials to you on the same day, if the goods are in stock in the required quantity. You also have the opportunity to pick up materials from our warehouses at any of the three addresses:
- 71 Buttermill Ave Vaughan, ON, L4K 3X2
- 234 Hood Rd. Markham, ON L3R 3K8
- 49 Truman Rd, Barrie, ON L4N 8Y7